
3M adhesive backing magnets are widely known for their versatility and ease of use, making them an ideal solution for many applications in both home and industrial settings. Their strong adhesive backing ensures that they remain securely in place while the magnetic side provides excellent holding strength for a variety of materials. While using these magnets is straightforward, there are a few essential installation and usage techniques that can help optimize their performance and ensure long-lasting results. In this guide, we’ll take you through a step-by-step process to help you maximize the utility of 3M adhesive backing magnets.
Understanding 3M Adhesive Backing Magnets
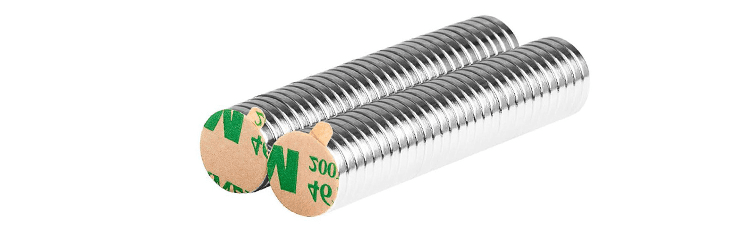
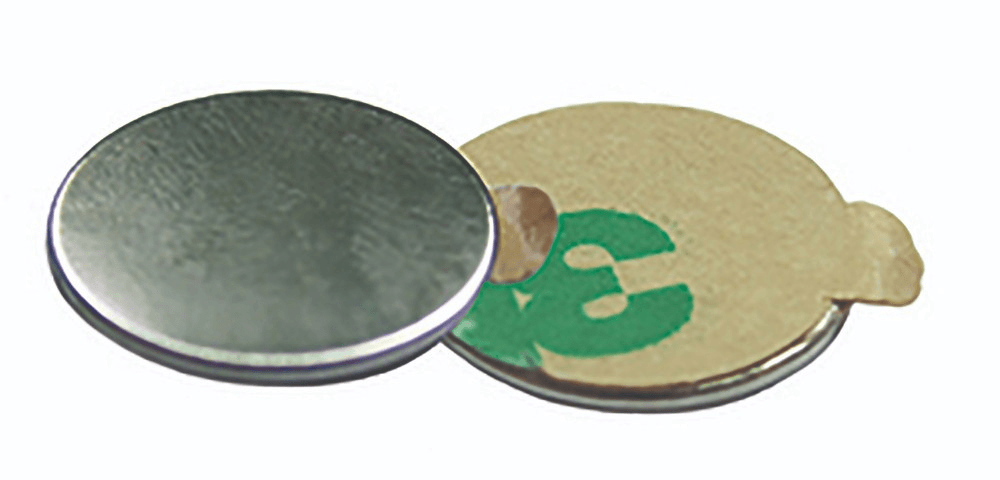
Before diving into the installation process, it is crucial to understand the key components and functionality of 3M adhesive backing magnets. These magnets are typically composed of a magnetic surface on one side and a durable 3M adhesive layer on the other side. The adhesive is designed to bond securely with various surfaces, while the magnetic side can be used to hold metal objects or be attached to other magnets. The 3M adhesive used in these magnets is well-known for its strength, durability, and ability to bond with a wide range of materials, including plastic, wood, metal, and glass.
Common Applications of 3M Adhesive Backing Magnets
3M adhesive backing magnets have a wide range of applications, including but not limited to:
- Home organization: These magnets are often used to mount small items such as keys, tools, or kitchen utensils on metal surfaces like refrigerators or toolboxes.
- Office use: They are ideal for organizing office spaces, holding up whiteboards, or attaching documents to magnetic boards.
- Industrial applications: In industrial settings, they are commonly used to mount signs, hold machinery parts, or secure wiring and cables.
- Automotive: 3M magnets are often used in automotive applications for attaching accessories or securing parts temporarily.
Preparing for Installation
Proper preparation is essential to ensure the magnets adhere securely to the surface and deliver optimal performance. Here are the steps you should follow before installing the 3M adhesive backing magnets:
1. Select the Right Magnet for the Job
Not all 3M adhesive backing magnets are created equal, and choosing the right one depends on your specific needs. Magnets come in different shapes, sizes, and strengths, so consider the weight of the object you need to hold and the size of the surface area where the magnet will be installed. Some magnets are thin and flexible, while others are more rigid and designed for heavier-duty applications.
- Flexible magnets: These are ideal for lightweight applications like attaching papers or small items to refrigerators or whiteboards.
- Rigid magnets: These are better suited for industrial applications or for holding heavier objects like tools or equipment.
2. Clean the Surface
The surface where you plan to install the magnet must be clean and free from dirt, dust, grease, or oil. Contaminants can interfere with the adhesive’s ability to bond effectively. To clean the surface:
- Use a damp cloth to wipe away any dirt or debris.
- If the surface is greasy or oily, use rubbing alcohol or a mild cleaning solution.
- Allow the surface to dry completely before proceeding with the installation.
3. Check Surface Compatibility
Different surfaces can impact the adhesive performance. The 3M adhesive used in these magnets is compatible with most surfaces, including plastic, metal, glass, and wood. However, certain surfaces like highly porous materials (e.g., rough concrete) or surfaces exposed to extreme temperatures may require special adhesives or surface treatment.
Installing the 3M Adhesive Backing Magnet
Once the surface is prepared, it’s time to install the 3M adhesive backing magnet. Follow these steps to ensure a secure and long-lasting installation:
1. Measure and Mark the Installation Area
To ensure proper placement, measure and mark the area where you plan to install the magnet. This is especially important if you are working with multiple magnets or need precise alignment. You can use a ruler or measuring tape for accuracy.
2. Peel Off the Adhesive Liner
Carefully peel off the protective liner from the adhesive side of the magnet. Be cautious not to touch the adhesive directly with your fingers, as the oils from your skin can reduce the adhesive’s effectiveness.
3. Apply the Magnet to the Surface
Position the adhesive side of the magnet over the marked area and press it firmly onto the surface. Apply even pressure across the entire magnet to ensure a strong bond. If possible, use a roller or flat object to press down on the magnet evenly, which helps eliminate any air bubbles trapped underneath.
4. Allow the Adhesive to Cure
While the 3M adhesive provides an initial bond, it takes time for the adhesive to reach full strength. It’s recommended to let the magnet sit undisturbed for at least 24 to 72 hours to allow the adhesive to cure fully. During this time, avoid placing any weight or stress on the magnet.
Tips for Optimizing Performance
Even after installation, there are several tips and techniques you can use to optimize the performance of 3M adhesive backing magnets and ensure they remain effective over time:
1. Avoid Overloading the Magnet
While 3M adhesive backing magnets are designed to hold a certain amount of weight, exceeding their load capacity can weaken the adhesive bond and cause the magnet to fail. Always check the manufacturer’s specifications for weight limits and ensure that you are using the appropriate magnet for the job.
2. Temperature Considerations
Extreme temperatures can affect the performance of both the magnet and the adhesive. High temperatures can cause the adhesive to soften, while cold temperatures can make the adhesive brittle. If the magnet will be exposed to extreme temperatures, consider using a specialized adhesive or magnet designed for temperature resistance.
3. Repositioning and Removal
If you need to reposition or remove the magnet, carefully peel it off the surface without applying too much force, as this can damage both the magnet and the surface. If the adhesive leaves residue, use rubbing alcohol or an adhesive remover to clean the surface.
4. Regular Maintenance
To ensure long-term effectiveness, periodically check the condition of the magnet and adhesive. Dust, moisture, or debris can accumulate over time and weaken the bond, so it’s a good idea to clean the area around the magnet regularly.
Troubleshooting Common Issues
While 3M adhesive backing magnets are generally reliable, you may encounter some common issues during installation or use. Here are a few troubleshooting tips:
1. Weak Adhesive Bond
If the magnet doesn’t stick properly, it’s usually due to improper surface preparation. Re-clean the surface and make sure it is dry and free of contaminants before reapplying the magnet.
2. Magnet Slippage
If the magnet slips after installation, it could be because the surface is too smooth or the adhesive hasn’t fully cured. To fix this, try using a stronger adhesive or adding texture to the surface to improve grip.
3. Residual Adhesive on the Surface
When removing the magnet, some adhesive may remain on the surface. To remove it, use an adhesive remover or rubbing alcohol, being careful not to damage the surface underneath.
Enhancing the Durability of 3M Adhesive Backing Magnets
One of the primary advantages of 3M adhesive backing magnets is their durability. However, certain practices can help extend their lifespan even further. Here are a few strategies to enhance the durability of your magnets:
1. Use a Sealant for Outdoor Applications
If you are using the magnets in outdoor or high-humidity environments, applying a protective sealant over the adhesive can help prevent moisture damage and improve the bond’s longevity.
2. Store Unused Magnets Properly
If you have extra magnets that aren’t currently in use, store them in a cool, dry place away from direct sunlight and extreme temperatures. This will help preserve the adhesive’s effectiveness for future use.
3. Avoid Contact with Chemicals
Harsh chemicals can break down the adhesive and weaken the bond over time. If the magnet is exposed to chemicals, clean the area immediately with water and a mild detergent.
Conclusion
3M adhesive backing magnets offer a convenient and versatile solution for a wide range of applications. By following the installation and usage tips outlined in this guide, you can ensure that your magnets deliver reliable performance and long-lasting results. Whether you’re organizing your home, improving your workspace, or tackling industrial tasks, these magnets provide a durable and effective method for securing objects with ease.
Remember to choose the right magnet for your specific needs, properly prepare the surface, and allow the adhesive to cure fully for optimal performance. With the right techniques, you can maximize the utility of 3M adhesive backing magnets and enjoy their benefits for years to come.